Quad Series Flatbed Assembly Guide (2026)
Complete quad series flatbed assembly guide with step-by-step instructions, tips, and common mistakes to avoid. Get your Bedrock flatbed installed right the first time.
TL;DR: Assembling a Quad series flatbed requires mounting the subframe, securing the bed deck, connecting wiring harnesses, and torquing all hardware to spec. With the right tools and this step-by-step guide, most installs take 4–8 hours. Proper prep and torque specs are the keys to a safe, lasting build.
Quad Series Flatbed Assembly Guide (2026)
So you've invested in a Bedrock Quad series flatbed — one of the most capable aluminum truck bed platforms on the market — and now it's time to put it all together. Whether you're a first-time installer or a seasoned fabricator refreshing your process, this comprehensive quad series flatbed assembly guide walks you through every phase: preparation, subframe mounting, deck installation, wiring, and final inspection.
Done correctly, the assembly process results in a flatbed that's rock-solid, properly weighted, and ready for serious work. Done incorrectly, even small mistakes — like under-torqued hardware or misaligned cab clearance — can cause costly damage or safety hazards. Let's get it right.
What Tools and Materials Do You Need Before Starting?
Before touching a single bolt, gather everything you need. Having the right tools on hand prevents mid-install frustration and keeps the job moving safely and efficiently. Most Quad series builds require standard hand tools plus a few specialty items for alignment and torque verification.
Required Tools Checklist
- 3/8" and 1/2" drive ratchet sets with metric and SAE sockets
- Torque wrench (capable of 0–150 ft-lbs)
- Floor jack and jack stands (minimum 3-ton rated)
- Drill with step bits (for wiring grommets if needed)
- Wire stripper and crimping tool
- Tape measure and level
- Rubber mallet
- Thread-locking compound (medium-strength, blue Loctite 243 or equivalent)
- Safety glasses and work gloves
- Helper or engine hoist for lifting the deck assembly
What's Included in the Quad Series Kit
Every Bedrock Quad series flatbed ships with the main deck assembly, subframe crossmembers, mounting hardware pack, wiring harness, and instruction sheet. Before you begin, lay all components out and verify against the packing list. Missing hardware is much easier to address before you're halfway through the install.
How Do You Prepare Your Truck for a Flatbed Swap?
Proper truck preparation is the single most important phase of the entire quad series flatbed assembly process. Skipping prep steps causes misalignment, wiring problems, and frame contact issues that are difficult to fix after the bed is mounted.
Step 1 — Remove the Stock Bed
- Disconnect the truck battery (negative terminal first) to avoid electrical shorts during wiring work.
- Unplug all factory wiring connectors running to the tail lights, fuel filler, and any bed-mounted accessories. Label each connector with tape before unplugging — you'll thank yourself later.
- Remove the four to six bed mounting bolts from the frame rails. Most full-size trucks use 9/16" or 14mm bolts at each mount pad.
- With a helper (or an engine hoist with lifting straps), lift the stock bed straight up and off the truck. Set it aside safely — stock beds are worth selling.
Step 2 — Clean and Inspect the Frame Rails
With the stock bed removed, inspect the frame rail tops thoroughly. Look for:
- Rust or corrosion at the mount pads — wire brush and apply rust converter if needed
- Bent or deformed mounting pads from prior impacts
- Pre-existing wiring damage that should be repaired before the new bed goes on
Clean all mounting surfaces with a degreaser and allow to dry completely. A clean, flat surface is critical for the subframe to sit properly.
Step 3 — Measure Your Cab-to-Axle (CA) Distance
Measure the CA distance — from the back of the cab to the center of the rear axle — and verify it matches the CA specification your Quad series flatbed was ordered for. This is a critical fit check. A mismatch here means the bed won't sit in the right position relative to the cab.
| Truck Class | Typical CA Range | Common Quad Series Fit |
|---|---|---|
| 1/2-ton (e.g., F-150, RAM 1500) | 56"–60" | Quad Diamond, Quad Granite |
| 3/4-ton (e.g., F-250, RAM 2500) | 60"–72" | Quad Granite, Quad Granite Plus |
| 1-ton (e.g., F-350, RAM 3500) | 72"–84" | Quad Granite Plus, Quad Onyx |
| 1-ton DRW | 84"–96" | Quad Onyx, Quad Marble |
For a full breakdown of which model fits your application, visit the About QUAD | Flatbeds by BEDROCK Truck Beds page for model-specific sizing details.
How Do You Mount the Subframe and Crossmembers?
The subframe is the structural bridge between your truck's frame rails and the aluminum deck. Getting this stage right determines everything that comes after — level deck, correct cab clearance, and long-term structural integrity.
Step 4 — Position the Subframe Assembly
- With a helper, lift the subframe assembly onto the frame rails and position it so the front crossmember is flush with the back of the cab skirt.
- Use a level across the front crossmember to confirm left-to-right levelness before tightening anything.
- Check that the subframe is centered side-to-side on the frame rails — measure from each frame rail edge to the subframe edge on both sides.
Step 5 — Install Mounting Hardware Hand-Tight
Install all subframe-to-frame mounting bolts hand tight only at this stage. Do not torque anything until all hardware is in place and alignment is confirmed. This is one of the most commonly skipped steps and one of the most important — torquing before all bolts are threaded can pull the subframe out of alignment.
Apply medium-strength thread-locking compound (blue Loctite) to each bolt before threading. This prevents vibration-induced loosening over time — critical for work trucks that see rough terrain.
Step 6 — Final Alignment Check and Torque
With all hardware hand-tight:
- Recheck level front-to-rear and side-to-side.
- Verify cab clearance — there should be a minimum 1/2" gap between the subframe front and the cab back panel at all points.
- Torque all subframe mounting bolts to the specification listed in your Bedrock assembly sheet (typically 65–95 ft-lbs depending on bolt size). Always torque in a crossing pattern, not sequentially around the perimeter.
How Do You Install the Flatbed Deck?
With the subframe secured, it's time to set the deck. This is where your Quad series flatbed really starts to take shape. The deck assembly is heavy — most Quad series aluminum decks range from 280 to 420 lbs depending on size and configuration — so proper lifting technique and a second person are non-negotiable.
Step 7 — Set and Center the Deck
- Using an engine hoist with appropriately rated lifting straps, lift the deck and lower it carefully onto the subframe crossmembers.
- Center the deck side-to-side — overhang should be equal on both sides.
- Check that the deck front edge aligns with the front subframe crossmember.
Step 8 — Secure Deck to Subframe
Install deck-to-subframe hardware through the designated mounting slots. The slotted holes allow minor front-to-rear and side-to-side adjustment — take advantage of this before final torque.
- Torque deck mounting hardware to spec (refer to your included hardware sheet)
- Recheck all four corners are flush to the subframe — no rocking or gaps
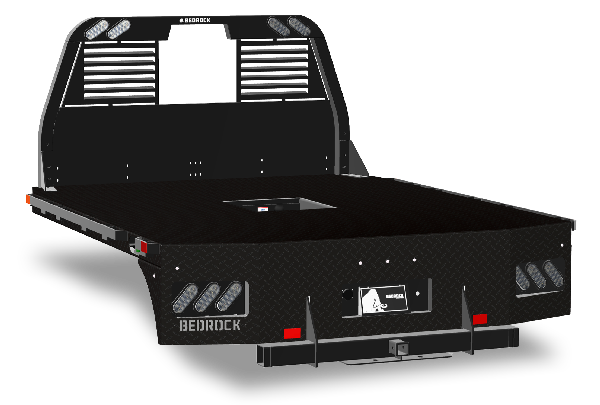
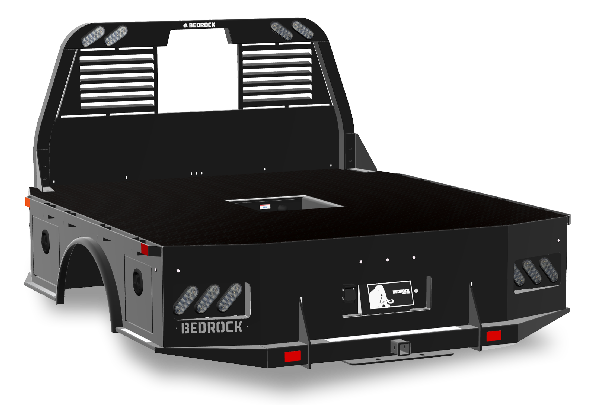
For the [Quad Diamond Flatbed | Bedrock Truck Beds](https://www.bedrocktruckbeds.com/quad diamond), the deck features the signature diamond-plate aluminum surface that adds both traction and visual appeal. The [Quad Granite Flatbed | Bedrock Truck Beds](https://www.bedrocktruckbeds.com/quad granite) uses an extruded aluminum plank deck for a cleaner profile and excellent drainage.
How Do You Wire the Lights on a Quad Series Flatbed?
Wiring is where many DIY installs go sideways. A clean, weatherproof wiring job ensures your tail lights, brake lights, and turn signals work reliably for years — especially important since a non-functioning brake light is a safety and legal issue.
Step 9 — Route the Wiring Harness
- Run the Bedrock-supplied wiring harness from the truck's factory tail light connector forward, along the frame rail, and back to the new tail light locations.
- Secure the harness with zip ties every 12–18 inches. Keep it away from exhaust components, sharp edges, and pinch points.
- Use rubber grommets anywhere the harness passes through a drilled hole.
Step 10 — Connect and Test All Lights
- Connect the harness to the factory plug — it should be a direct plug-and-play connection on most late-model trucks.
- Reconnect the battery.
- Test all functions: brake lights, turn signals, reverse lights, running lights, and any accessory circuits (work lights, etc.).
- Walk around the truck and have a helper work each function — don't assume it's working without a physical check.
According to the FMCSA Commercial Vehicle Safety Standards, all commercial motor vehicles must have functioning brake lights, tail lights, and turn signals visible from a minimum distance. Even for personal use, these standards reflect best practices every truck owner should follow.
What Are the Most Common Mistakes to Avoid?
Experienced installers — and those learning from hard-won experience — consistently flag the same avoidable errors. Getting these right separates a professional-quality install from one that causes problems down the road.
Mistake #1 — Skipping the Torque Wrench
Hand-tight is never enough for structural fasteners. Under-torqued bolts back out under vibration. Over-torqued bolts stretch and lose clamping force — or strip threads entirely. Use a calibrated torque wrench every time.
Mistake #2 — Not Checking Cab Clearance
Many installers focus on side-to-side alignment and forget to verify the front edge of the subframe doesn't contact the cab. Even 1/8" of contact creates annoying squeaking and can damage both the cab panel and the subframe over time.
Mistake #3 — Running Wiring Without Grommets
Bare wire passing through a drilled hole will chafe through its insulation within months. Every penetration needs a grommet — this is non-negotiable for a durable install.
Mistake #4 — Installing Without a Helper
The deck assembly is simply too heavy and awkward for one person to handle safely. A helper prevents dropped components, finger injuries, and misalignment during the critical positioning phase.
Mistake #5 — Forgetting to Apply Thread Locker
Vibration is relentless on a work truck. Without thread-locking compound on structural fasteners, hardware will back out. According to Loctite's Technical Bulletin on Threadlocker Selection, medium-strength (blue) thread locker is appropriate for fasteners requiring periodic removal, while high-strength (red) is for permanent joints.
Final Inspection Checklist Before Your First Drive
Before you pull out of the garage, run through this final checklist:
- All subframe-to-frame bolts torqued to spec
- All deck-to-subframe bolts torqued to spec
- Minimum 1/2" cab clearance confirmed at all points
- Deck centered and level side-to-side and front-to-rear
- All lights functioning: brake, tail, turn, reverse
- Wiring harness secured and protected at all routing points
- No tools, hardware, or debris left on the deck or under the truck
- Re-torque all fasteners after first 500 miles (highly recommended)
The 500-mile re-torque is a real-world best practice that most assembly guides skip. New hardware seats and compresses under load during the first few hundred miles. A re-torque catches any settling that occurred and ensures everything stays tight long-term.
FAQ: Quad Series Flatbed Assembly Guide
Q: How long does a Quad series flatbed installation take? A: For a first-time installer with a helper, plan for 6–8 hours. An experienced installer familiar with the process can complete it in 4–5 hours. Don't rush — careful alignment during subframe installation saves significant time later.
Q: Do I need to weld anything during the Quad series assembly? A: No. The Bedrock Quad series is designed as a bolt-on assembly. No welding is required. All joints use the supplied hardware and standard hand tools.
Q: What's the weight capacity of a Quad series flatbed? A: Payload capacity depends on your truck's GVWR and the specific Quad series model. Always consult your truck's door-jamb sticker for rated payload and subtract the flatbed weight from that figure to determine your usable cargo capacity.
Q: Can I install a Quad series flatbed by myself without a helper? A: The subframe installation can be done solo with care, but lifting the deck assembly safely requires at minimum one helper or an engine hoist. Attempting to solo-lift the deck risks injury and equipment damage.
Q: What thread locker should I use on the mounting hardware? A: Medium-strength (blue) Loctite 243 or equivalent is recommended for structural fasteners that may need future removal. Avoid high-strength (red) thread locker unless a joint is intended to be permanent.
Q: How much cab clearance should I leave between the flatbed and the cab? A: A minimum of 1/2" clearance is recommended at all contact points. This accounts for cab flex during hard cornering and prevents metal-on-metal contact that causes noise and damage.
Q: What's the difference between the Quad Diamond and Quad Granite deck surfaces? A: The [Quad Diamond Flatbed | Bedrock Truck Beds](https://www.bedrocktruckbeds.com/quad diamond) features a classic diamond-plate aluminum surface, while the [Quad Granite Flatbed | Bedrock Truck Beds](https://www.bedrocktruckbeds.com/quad granite) uses extruded aluminum planks for improved drainage and a lower-profile appearance. Both are fully aluminum construction.
Q: Do I need to re-torque the hardware after the first drive? A: Yes — a re-torque at 500 miles is strongly recommended. New hardware seats under load during initial use, and a follow-up torque check ensures everything remains at spec for long-term safety and performance.
Ready to choose your model before you build? Explore the full lineup at About QUAD | Flatbeds by BEDROCK Truck Beds and find the right platform for your truck and application.
Interested in learning more?
Visit our website to explore products, find dealers, and get in touch.
Visit Bedrock Truck Beds →