How to Install Truck Flatbed: Complete Step-by-Step Guide
Learn how to install truck flatbed with our complete guide. Get step-by-step instructions, tools needed, and expert tips for a professional installation.
TL;DR: Installing a truck flatbed requires removing the stock bed, drilling mounting holes, positioning the new flatbed, and securing with grade 8 bolts. Professional installation takes 2-4 hours with basic tools.
What Tools Do You Need to Install a Truck Flatbed?
Installing a truck flatbed requires specific tools and equipment to ensure a safe, secure installation. You'll need a socket set (10mm-19mm), drill with metal bits, center punch, measuring tape, level, safety glasses, and grade 8 bolts with washers. Having the right tools prevents delays and ensures proper torque specifications are met.
Essential tools include:
- Complete socket set (metric and standard)
- Cordless drill with metal drilling bits
- Center punch for marking holes
- 25-foot measuring tape
- 4-foot level for alignment
- Safety equipment (glasses, gloves)
- Torque wrench (crucial for proper bolt tension)
- Jack and jack stands for safety
- Pry bar for bed removal
- Wire strippers for electrical connections
Optional but helpful tools include a plasma cutter for custom modifications, welding equipment for reinforcement brackets, and a hoist or crane for heavy flatbed models. According to the National Institute for Occupational Safety and Health, proper lifting equipment reduces installation injuries by 60%.
How Do You Remove Your Stock Truck Bed?
Removing the stock truck bed is the first critical step before flatbed installation. Start by disconnecting the negative battery cable, then remove the tailgate and any electrical connections to the bed. Most stock beds are held by 6-8 bolts along the frame rails, which require complete removal before the bed can be lifted off.
Follow this removal sequence:
- Disconnect electrical systems - Unplug tail lights, backup lights, and any bed accessories
- Remove tailgate - Most tailgates lift off after removing hinge pins
- Locate mounting bolts - Typically found along the inner frame rails
- Support the bed - Use helpers or lifting equipment before removing final bolts
- Document bolt locations - Take photos for reference during flatbed installation
- Clean mounting surfaces - Remove old gaskets, rust, and debris
Stock beds typically weigh 200-400 pounds depending on truck size and bed length. Never attempt removal without proper support, as dropping a bed can cause serious injury or damage to the truck frame.
What Size Flatbed Do You Need for Your Truck?
Flatbed sizing depends on your truck's wheelbase, frame width, and intended use. Standard sizes range from 8-foot beds for regular cab trucks to 11-foot beds for crew cab long-bed models. Measure your frame rails center-to-center and from the back of the cab to determine the correct flatbed dimensions.
| Truck Configuration | Bed Length | Frame Width | Typical Use |
|---|---|---|---|
| Regular Cab Short Bed | 6.5-8 ft | 34-44 inches | Light hauling, personal use |
| Extended Cab | 8-9 ft | 34-44 inches | Mixed personal/work use |
| Crew Cab Short Bed | 5.5-6.5 ft | 34-44 inches | Family truck with work needs |
| Crew Cab Long Bed | 8-11 ft | 34-44 inches | Heavy commercial use |
| Commercial Chassis | 9-14 ft | 44-60 inches | Professional contractors |
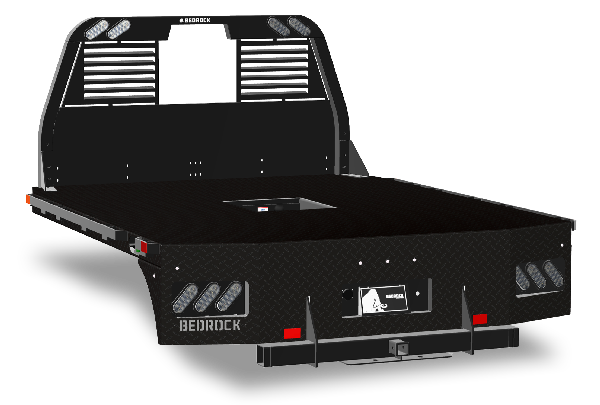
Measure twice, order once. Incorrect sizing can result in expensive returns, delayed projects, and potential safety issues. Most quality flatbed manufacturers like those offering Quad Granite Flatbed | Bedrock Truck Beds provide detailed measurement guides to ensure proper fitment.
How Do You Mark and Drill Mounting Holes?
Accurate hole marking and drilling is crucial for proper flatbed alignment and load distribution. Start by positioning the flatbed on the frame rails using temporary supports, then mark mounting hole locations with a center punch. Drill pilot holes first, then enlarge to final size using progressively larger bits to prevent frame damage.
Step-by-step drilling process:
- Position flatbed temporarily - Use blocks or helpers to hold flatbed in final position
- Check alignment - Measure diagonals to ensure square positioning
- Mark hole centers - Use center punch through flatbed mounting holes
- Start with pilot holes - Use 1/8" bit for initial holes
- Step up bit sizes - Progress through 1/4", 3/8", to final 1/2" or 5/8" holes
- Deburr all holes - Remove sharp edges that can cause stress concentrations
- Apply primer - Coat exposed metal to prevent rust
Drilling through truck frames requires sharp, high-quality bits. HSS (High-Speed Steel) bits work well for most applications, while cobalt bits handle harder steel frames. Never force the drill - let the bit do the work to maintain hole quality and prevent frame cracking.
What's the Proper Way to Position Your Flatbed?
Proper flatbed positioning ensures optimal weight distribution, vehicle balance, and safe operation. The flatbed should sit level both front-to-back and side-to-side, with equal overhang on both sides. Most installations position the flatbed 2-4 inches behind the back of the cab for adequate clearance during tight turns.
Critical positioning guidelines:
- Cab clearance: Maintain 2-4 inches minimum between flatbed and cab
- Side overhang: Equal extension beyond frame rails (typically 6-12 inches per side)
- Front-to-back level: Use a 4-foot level across the bed surface
- Frame contact: Ensure full contact between flatbed brackets and frame rails
- Electrical routing: Plan wire paths before final positioning
Temporary positioning blocks or adjustable supports make fine-tuning easier. Don't rush this step - proper positioning affects everything from vehicle handling to load security. Professional installations often use laser levels for precision alignment, especially on commercial applications.
How Do You Secure the Flatbed with Hardware?
Securing your flatbed requires grade 8 bolts, washers, and lock nuts rated for your truck's gross vehicle weight. Most installations use 1/2" or 5/8" diameter bolts with a minimum of 6 mounting points. Proper torque specifications prevent both under-tightening (loosening over time) and over-tightening (frame damage).
Hardware specifications:
- Bolt grade: Grade 8 minimum for structural integrity
- Diameter: 1/2" for light duty, 5/8" for heavy commercial use
- Length: Through-bolt plus 1.5 inches minimum thread engagement
- Washers: Use both flat washers and lock washers
- Torque specs: 75-85 ft-lbs for 1/2" bolts, 120-130 ft-lbs for 5/8" bolts
Apply thread locker to all bolts before installation. Blue thread locker (medium strength) allows future removal while preventing loosening from vibration. Red thread locker provides maximum security but requires heat for removal.
Tighten bolts in a cross pattern, similar to wheel lug nuts, to ensure even clamping force distribution. Re-check torque specifications after the first 500 miles of operation, as initial settling may require retightening.
What Are Common Installation Mistakes to Avoid?
Many flatbed installations fail due to preventable mistakes that compromise safety and longevity. The most common error is insufficient frame preparation, including failing to clean mounting surfaces or not addressing existing rust. Poor hole drilling technique ranks second, followed by incorrect hardware selection and improper torque specifications.
Critical mistakes that cause installation failure:
- Skipping frame inspection - Hidden rust or damage can cause catastrophic failure
- Wrong drill bit progression - Jumping to large bits cracks frames
- Mismatched hardware - Using grade 5 bolts instead of grade 8
- Ignoring electrical - Poor wire routing causes shorts and failures
- Inadequate support - Dropping beds during removal injures installers
- Torque guessing - Under or over-tightening leads to premature failure
- Rushing alignment - Poor positioning affects vehicle handling
- Skipping primer - Exposed metal rusts quickly in mounting areas
According to Commercial Vehicle Safety Alliance data, improper flatbed installation contributes to 15% of commercial vehicle out-of-service violations during roadside inspections.
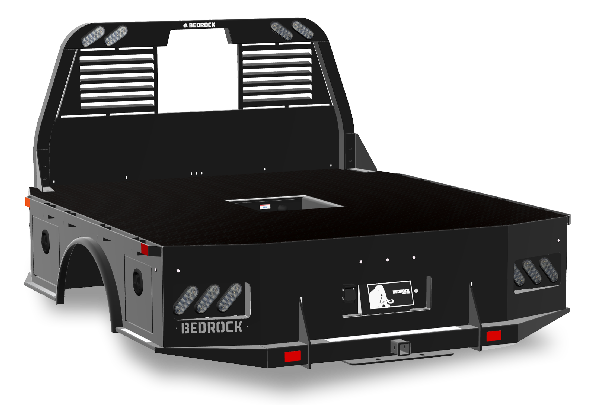
Professional installers recommend taking photos throughout the process for warranty documentation and future reference. Quality flatbed manufacturers like those offering the Slate Flatbed | Bedrock Truck Beds provide detailed installation guides to prevent these common errors.
How Do You Connect Electrical Components?
Electrical connections for flatbed installations include tail lights, brake lights, turn signals, and often auxiliary lighting for work applications. Most trucks use a 7-pin connector system, though some require custom wiring harnesses. Proper wire routing prevents damage from road debris, frame flex, and weather exposure.
Electrical installation steps:
- Identify wire functions - Use a multimeter to verify pin assignments
- Route wires safely - Avoid sharp edges, heat sources, and moving parts
- Use weatherproof connectors - Marine-grade connections prevent corrosion
- Secure wire runs - Cable ties every 12 inches prevent chafing
- Test all functions - Verify lights before completing installation
- Apply dielectric grease - Protects connections from moisture
LED lighting systems draw less power and last longer than incandescent bulbs, making them ideal for flatbed applications. Most quality flatbed systems include pre-wired harnesses that simplify installation and ensure proper connections.
When Should You Consider Professional Installation?
Professional installation becomes necessary for complex applications, liability concerns, or when you lack proper tools and experience. Commercial operators often require certified installations for insurance compliance, while liability issues make professional installation worth the cost for many truck owners.
Consider professional installation if:
- Your truck requires frame modifications
- You're installing a PTO or hydraulic system
- Insurance or warranty requires certified installation
- You lack experience with automotive electrical systems
- The flatbed weighs over 500 pounds
- Your application involves commercial use
Professional installation typically costs $500-1500 depending on complexity, but includes warranty coverage and insurance compliance. Many professional installers offer mobile services, bringing tools and expertise to your location.
For detailed installation guidance and professional-quality flatbeds, visit the comprehensive installation resources at Bedrock Truckbeds where you can find everything needed for a successful flatbed conversion.
How Do You Test Your Installation?
Testing your flatbed installation ensures safety and identifies potential issues before they become dangerous failures. Start with a visual inspection of all mounting points, then perform load tests using progressively heavier weights. Road testing should begin with empty bed operation before adding cargo.
Comprehensive testing checklist:
- Visual inspection: Check all bolt torques and mounting points
- Electrical test: Verify all lighting functions work properly
- Load test: Apply 150% of intended working load (static test only)
- Road test: Drive empty bed first, then with light loads
- Retorque bolts: Check all hardware after first 100 miles
- Long-term monitoring: Inspect monthly for the first year
Proper testing prevents catastrophic failures that can result in accidents, cargo loss, or expensive repairs. Document your testing process with photos and measurements for warranty purposes and future reference.
Frequently Asked Questions
How long does flatbed installation take?
Typical installations require 2-4 hours for experienced mechanics, or 4-6 hours for first-time installers. Complex installations with electrical modifications can take 6-8 hours.
Can I install a flatbed without removing the stock bed?
No, the stock bed must be completely removed to access frame mounting points and ensure proper flatbed positioning and alignment.
What size bolts should I use for mounting?
Most installations use 1/2" grade 8 bolts for light-duty applications and 5/8" grade 8 bolts for heavy-duty commercial use. Consult your flatbed manufacturer's specifications.
Do I need special tools for installation?
Basic installations require common hand tools, a drill, and socket set. Complex installations may need welding equipment, plasma cutters, or hydraulic lifts.
How much weight can a flatbed handle?
Weight capacity depends on truck frame rating, flatbed construction, and mounting hardware. Most flatbeds handle 2000-5000 pounds, but check manufacturer specifications.
Should I use thread locker on mounting bolts?
Yes, blue thread locker (medium strength) prevents vibration loosening while allowing future removal. Apply to all structural mounting bolts.
How often should I check mounting hardware?
Inspect mounting bolts monthly for the first year, then quarterly. Re-torque bolts after the first 500 miles and annually thereafter.
Can I install a flatbed on any truck?
Most trucks can accommodate flatbeds, but frame condition, electrical systems, and intended use affect compatibility. Consult with flatbed manufacturers for specific applications.
Interested in learning more?
Visit our website to explore products, find dealers, and get in touch.
Visit Bedrock Truck Beds →